Hey there! I'm an enthusiast from a 700l Boom Sprayers supplier. I've been involved in dealing with these amazing machines for years, and I know firsthand how crucial calibration is for efficient spraying. So, let's dive into how to calibrate a 700l Boom Sprayer.
Why Calibration Matters
First off, why bother with calibration? Well, a properly calibrated boom sprayer ensures that you're applying the right amount of pesticide, herbicide, or fertilizer to your fields. If you don't calibrate it correctly, you might end up under - applying, which won't effectively control pests or weeds, or over - applying, which can be costly and harmful to the environment.
Pre - Calibration Preparation
Before we start the actual calibration process, there are a few things you need to do. First, check your sprayer thoroughly. Make sure all the nozzles are clean and in good condition. Clogged or damaged nozzles can affect the spray pattern and the amount of liquid being dispensed. I usually take out the nozzles and soak them in a cleaning solution to remove any debris.

Inspect the hoses for leaks or cracks. A leaky hose can lead to inconsistent spraying and inaccurate calibration. Also, check the pressure gauge. An inaccurate pressure gauge can give you false readings, so it's essential to make sure it's working correctly. You can use a pressure tester to verify the reading.
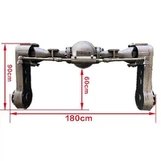
Step 1: Measure the Spray Width
The first step in calibrating your 700l Boom Sprayer is to measure the spray width. This is the distance that the sprayer covers in one pass. You can do this by marking a starting point in your field and then driving the sprayer forward for a short distance, say 100 feet. After that, measure the width of the wet area on the ground. Let's say your spray width turns out to be 20 feet. This measurement is crucial as it will be used in calculating the application rate.
Step 2: Determine the Travel Speed
Next, you need to figure out your travel speed. You can use a GPS on your tractor or a speedometer if your tractor is equipped with one. Drive the sprayer across a measured distance, like 1/8 mile, and time how long it takes. Let's say it takes you 2 minutes to cover this distance. Using the formula speed = distance/time, you can calculate your travel speed. In this case, if 1/8 mile is 660 feet and 2 minutes is 120 seconds, your speed is 660 feet/120 seconds = 5.5 feet per second. To convert it to miles per hour, you multiply by 0.6818. So, 5.5 feet per second is approximately 3.75 miles per hour.
Step 3: Collect the Spray Output
Now, it's time to collect the spray output from the nozzles. You can use collection cups or containers placed under each nozzle. Run the sprayer at the operating pressure you usually use for a set amount of time, say 30 seconds. Make sure to catch all the liquid coming out of the nozzles.
After the 30 - second interval, measure the amount of liquid in each container using a graduated cylinder. Let's assume that the total amount of liquid collected from all the nozzles is 1 liter in 30 seconds. To get the output per minute, you simply double this amount, so it's 2 liters per minute.
Step 4: Calculate the Application Rate
The application rate is the amount of liquid you're applying per unit area. You can calculate it using the formula:
Application rate (gallons per acre) = (Output per minute (in gallons) x 5940) / (Travel speed (in mph) x Spray width (in feet))
First, convert the output per minute from liters to gallons. Since 1 liter is approximately 0.264 gallons, 2 liters per minute is 2 x 0.264 = 0.528 gallons per minute.
Let's use our previous values of travel speed (3.75 mph) and spray width (20 feet). Plugging these values into the formula:
Application rate = (0.528 x 5940) / (3.75 x 20)
= 3136.32 / 75
= 41.82 gallons per acre
Step 5: Adjust the Application Rate (if needed)
If the calculated application rate is not what you want, you can adjust it. You can change the pressure, the nozzle size, or the travel speed.
If you want to increase the application rate, you can increase the pressure. But be careful not to go too high, as it can cause the spray to drift. You can also switch to larger - sized nozzles. On the other hand, if you want to decrease the application rate, you can lower the pressure or use smaller - sized nozzles. You can also increase your travel speed.
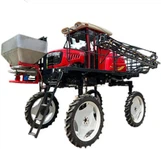
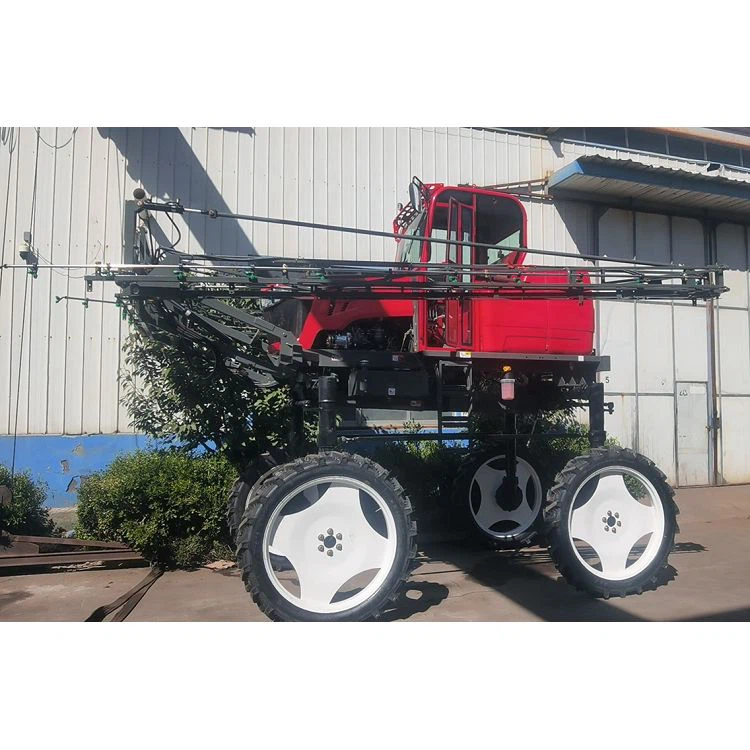
Different Types of 700l Boom Sprayers
We offer different types of 700l Boom Sprayers, such as 700l Boom Sprayers, Hydraulic Boom Sprayers, and High Clearance Boom Sprayers. Each type has its own unique features and is suitable for different agricultural needs.
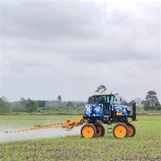
The hydraulic boom sprayers are great for those who need more control over the spray boom's movement. They allow you to adjust the height and angle of the boom easily, which is useful when working in different terrains or crop heights.
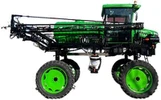
The high - clearance boom sprayers are designed for taller crops. They have a higher ground clearance, so you can drive the sprayer over crops without damaging them.
Conclusion and Call to Action
Calibrating your 700l Boom Sprayer is not as difficult as it might seem. By following these steps, you can ensure that your sprayer is applying the right amount of chemicals to your fields. This will not only save you money but also help protect the environment.
If you're in the market for a 700l Boom Sprayer or need more advice on calibration, feel free to get in touch with us. We're here to help you make the most out of your spraying operations. Contact us to discuss your requirements and let's work together to find the best solution for your farm.
References
- "Sprayer Calibration" by Agricultural Extension Services
- "Boom Sprayer Operation and Maintenance" by Tractor and Machinery Association