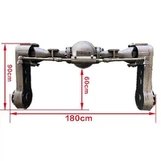
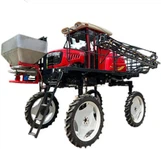
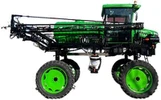
An agricultural boom sprayer is an essential tool for farmers and agricultural workers, enabling efficient and precise application of pesticides, fertilizers, and other agricultural chemicals. However, proper cleaning after each use is crucial to maintain its performance, extend its lifespan, and ensure the safety of subsequent applications. As a trusted supplier of agricultural boom sprayers, including ATV Sprayers with Booms, Front Boom Self-propelled Sprayers, and Manual Boom Sprayers, we understand the importance of this process. In this blog post, we'll guide you through the steps to clean your agricultural boom sprayer effectively.
Step 1: Preparation
Before you start cleaning your boom sprayer, it's important to gather all the necessary tools and materials. You'll need a large container for mixing cleaning solutions, a garden hose with a high - pressure nozzle, a soft - bristle brush, a bucket, and appropriate personal protective equipment (PPE) such as gloves, goggles, and a respirator. PPE is especially important when dealing with residues of potentially harmful agricultural chemicals.


Empty the sprayer tank completely. Make sure to follow local regulations for the proper disposal of any remaining chemicals. In some cases, you may need to take the leftover chemicals to a designated collection point. Once the tank is empty, remove any filters, nozzles, and screens from the sprayer. These components are often the most prone to clogging and require special attention.
Step 2: Rinse the Tank
Fill the sprayer tank about one - third full with clean water. Add a recommended cleaning agent. There are various cleaning agents available on the market specifically designed for agricultural sprayers. Some common types include detergents, degreasers, and acid - based cleaners. Follow the manufacturer's instructions regarding the amount of cleaning agent to use.
Agitate the water and cleaning agent mixture inside the tank. You can do this by running the sprayer pump for a few minutes to circulate the solution. This will help loosen any chemical residues stuck to the tank walls.
After agitating the solution, spray the mixture through the boom and nozzles. This will flush out any remaining chemicals in the hoses, boom, and nozzles. Make sure to cover all parts of the boom, including the tips of the nozzles. Once you've sprayed out as much of the solution as possible, drain the tank completely.
Step 3: Clean the Nozzles, Filters, and Screens
Soak the removed nozzles, filters, and screens in a container filled with the cleaning solution. Let them soak for at least 30 minutes to an hour. This will dissolve any stubborn residues.
Use a soft - bristle brush to gently scrub the nozzles, filters, and screens. Pay close attention to the small holes in the nozzles, as these can easily become clogged. Be careful not to damage the delicate parts while scrubbing.
Rinse the nozzles, filters, and screens thoroughly with clean water. Check the nozzles to ensure that the holes are clear. You can use a piece of fine wire or a nozzle cleaning tool to clear any remaining blockages, but be very gentle to avoid deforming the nozzles.
Step 4: Clean the Boom and Hoses
Inspect the boom for any visible signs of chemical residues or blockages. Use a high - pressure garden hose to rinse the boom thoroughly. Start from the base of the boom and work your way to the tips, making sure to cover all sides.
If there are stubborn residues on the boom, you can use a soft - bristle brush dipped in the cleaning solution to scrub them off. Be careful not to scratch the boom surface, as this could lead to corrosion over time.
For the hoses, flush them with clean water using the sprayer pump. Run the water through the hoses for several minutes to remove any remaining chemicals. If the hoses are particularly dirty, you may need to disconnect them from the sprayer and soak them in the cleaning solution for a while before rinsing.
Step 5: Clean the Pump and Valves
The pump and valves are critical components of the boom sprayer. To clean the pump, fill the tank with clean water and run the pump for several minutes. This will flush out any chemical residues inside the pump.
If possible, remove the pump cover and inspect the internal components for any signs of damage or blockage. Use a soft - bristle brush to clean the accessible parts of the pump. For the valves, check them for proper operation and clean them with the cleaning solution. Make sure to lubricate the moving parts of the valves according to the manufacturer's instructions.
Step 6: Final Rinse and Drying
After cleaning all the components, give the entire sprayer a final rinse with clean water. This will remove any traces of the cleaning solution. Make sure to rinse the tank, boom, hoses, nozzles, filters, screens, pump, and valves thoroughly.
Once rinsed, allow all the components to dry completely. You can leave the tank open to air - dry, and hang the hoses and boom in a well - ventilated area. Make sure that all parts are completely dry before reassembling the sprayer. This will prevent the growth of mold and mildew, which can damage the sprayer over time.
Step 7: Reassembly and Storage
Once all the components are dry, reassemble the sprayer. Install the clean nozzles, filters, and screens back into their respective positions. Make sure all connections are tight to prevent leaks.
Store the sprayer in a dry, protected area. If possible, cover the sprayer to protect it from dust and debris. Regularly inspect the stored sprayer for any signs of damage or corrosion.
Importance of Regular Cleaning
Regular cleaning of your agricultural boom sprayer offers several benefits. Firstly, it ensures the accuracy of chemical application. Clogged nozzles or hoses can lead to uneven spraying, which may result in under - or over - application of chemicals, affecting crop health and yield.
Secondly, proper cleaning extends the lifespan of the sprayer. Chemical residues can corrode the tank, hoses, and other components over time. By removing these residues, you can prevent premature wear and tear.
Finally, cleaning the sprayer helps protect the environment. Residues of agricultural chemicals can contaminate soil, water, and air if not properly removed. By keeping your sprayer clean, you reduce the risk of environmental pollution.
Conclusion
Cleaning an agricultural boom sprayer after each use is a crucial task that should not be overlooked. By following the steps outlined in this blog post, you can ensure that your sprayer remains in optimal condition, providing reliable performance for years to come.
As a leading supplier of agricultural boom sprayers, we are committed to providing high - quality products and comprehensive support to our customers. Whether you are looking for ATV Sprayers with Booms, Front Boom Self - propelled Sprayers, or Manual Boom Sprayers, we have the right solution for your needs. If you have any questions about our products or need advice on sprayer maintenance, please don't hesitate to contact us. We look forward to discussing your agricultural spraying requirements and helping you find the best equipment for your operations.
References
- Manufacturer's manuals of agricultural boom sprayers
- Agricultural chemical safety and handling guidelines
- Industry - standard best practices for sprayer cleaning