Hey there! I'm a supplier of 12m boom sprayers, and I'm stoked to walk you through the process of installing one on your tractor. Whether you're a seasoned farmer or just starting out, this guide will help you get your sprayer up and running in no time.
Pre - installation Checks
Before you even think about installing the 12m boom sprayer, you've gotta do some pre - installation checks. First off, make sure your tractor is up to the task. Check the tractor's power take - off (PTO) system. The PTO is what's gonna power the sprayer pump, so it needs to be in good working condition. You should also check the tractor's hydraulic system. The boom on the sprayer is usually controlled hydraulically, so the tractor's hydraulic system needs to have enough capacity to handle the load.
Next, take a good look at the 12m boom sprayer itself. Check for any visible damage during shipping. Look for dents, cracks, or loose parts on the boom, the tank, and the pump. If you find anything, don't try to install it right away. Contact our support team, and we'll help you sort it out. You can find more details about our 12m Boom Sprayer on our website.


Mounting the Sprayer on the Tractor
Once you've done all the pre - installation checks, it's time to start mounting the sprayer on the tractor. Most 12m boom sprayers come with a mounting bracket that's designed to fit onto the tractor's three - point hitch. The three - point hitch is a standard attachment system on tractors, and it provides a stable connection between the tractor and the sprayer.
First, position the sprayer near the tractor's three - point hitch. Make sure the mounting bracket on the sprayer lines up with the hitch points on the tractor. Then, use the pins provided to secure the sprayer to the tractor. Make sure the pins are inserted all the way and that they're locked in place. You don't want the sprayer to come loose while you're out in the field.
Connecting the Hydraulic Hoses
After mounting the sprayer, it's time to connect the hydraulic hoses. The hydraulic hoses are what control the movement of the boom. There are usually two hoses: one for raising and lowering the boom and another for extending and retracting it.
Locate the hydraulic couplers on the tractor and the sprayer. The couplers are the fittings at the end of the hoses. Make sure the couplers are clean before you connect them. Any dirt or debris can cause problems with the hydraulic system. Connect the hoses by pushing the couplers together until you hear a click. This indicates that they're properly connected.
Connecting the PTO Shaft
The PTO shaft is what transfers power from the tractor to the sprayer pump. To connect the PTO shaft, first, make sure the tractor's PTO is turned off. Then, align the PTO shaft on the sprayer with the PTO output on the tractor. There are usually splines on the shaft and the output that need to match up.
Slide the PTO shaft onto the PTO output and secure it with the locking mechanism. This could be a clip or a pin, depending on the design of the shaft. Once it's connected, double - check that it's firmly attached. You don't want the shaft to come loose while the tractor is running.
Filling the Tank and Testing the Sprayer
Now that everything is connected, it's time to fill the tank with water and test the sprayer. Fill the tank with clean water. You can use a hose or a bucket to fill it up. Make sure not to overfill the tank.
Start the tractor and engage the PTO. This will start the pump and begin the flow of water through the system. Check for any leaks in the hoses, the pump, or the boom. If you see any leaks, turn off the tractor and the PTO immediately. Tighten the connections or replace any damaged parts.
Next, test the boom movement. Use the hydraulic controls on the tractor to raise, lower, extend, and retract the boom. Make sure the boom moves smoothly and that it's level. If the boom isn't level, you may need to adjust the hydraulic settings.
Finally, test the nozzles. Walk along the path of the spray pattern and check that the water is being distributed evenly. If you notice any uneven spraying, you may need to clean or replace the nozzles.
Maintenance Tips
To keep your 12m boom sprayer in top shape, regular maintenance is a must. After each use, drain the tank and flush the system with clean water. This will prevent any chemicals from building up and causing damage to the pump and the nozzles.
Inspect the hoses and the boom regularly for wear and tear. Replace any hoses that are cracked or leaking. Check the nozzles for clogs and clean them as needed. You can use a small brush or a nozzle cleaning kit to do this.
If you're not going to use the sprayer for an extended period, store it in a dry, protected area. Make sure to disconnect the PTO shaft and the hydraulic hoses and store them properly.
Other Sprayer Options
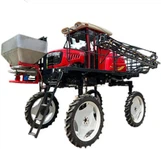
If you're looking for different sprayer options, we also offer High Ground Clearance Boom Sprayer and 20m Boom Sprayer. These sprayers have different features and capabilities that may better suit your specific needs.
Contact Us for Purchase
If you're interested in our 12m boom sprayer or any of our other products, don't hesitate to reach out. We're here to answer any questions you may have and help you make the right choice for your farming operation. Whether you need more information about installation, maintenance, or pricing, we've got you covered.
References
- Agricultural Sprayer Installation Manuals
- Tractor Operator's Manuals
So, there you have it! That's how you install a 12m boom sprayer on a tractor. With a little bit of time and effort, you'll be ready to start spraying your fields like a pro.