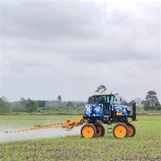
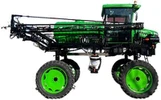
Hey there! As a supplier of 12m boom sprayers, I often get asked about how to calibrate these machines. Calibration is super important as it ensures that you're applying the right amount of chemicals to your fields, which can save you money and protect the environment. So, let's dive into the process of calibrating a 12m boom sprayer.
Why Calibration Matters
Before we get into the steps, let me tell you why calibration is a big deal. If your sprayer isn't calibrated correctly, you might end up applying too much or too little of the chemical. Applying too much can lead to over - treatment of your crops, which not only wastes money on extra chemicals but can also harm the environment. On the other hand, applying too little might not effectively control pests or diseases, leaving your crops at risk.
Step 1: Gather Your Tools
First things first, you'll need to gather some tools. You'll need a measuring container, like a graduated cylinder or a bucket with volume markings. A stopwatch is also essential for timing how long it takes to fill the container. You'll also want a tape measure to measure the distance you'll be spraying. And of course, don't forget your safety gear, like gloves and goggles.
Step 2: Check the Sprayer
Before you start calibrating, give your 12m boom sprayer a good once - over. Make sure all the nozzles are clean and in good condition. Clogged or damaged nozzles can affect the spray pattern and the amount of chemical being applied. Also, check the hoses and fittings for any leaks. A leaky sprayer can mess up your calibration and waste chemicals.
Step 3: Determine the Desired Application Rate
You need to know how much chemical you want to apply per unit area. This information is usually on the chemical label. It might be something like "apply 1 gallon per acre" or "apply 5 liters per hectare". Write this number down because you'll need it later.
Step 4: Measure the Nozzle Output
Now, it's time to measure how much liquid comes out of each nozzle. Park your sprayer on a level surface and turn on the pump to build up pressure. Hold your measuring container under one of the nozzles and start the stopwatch. Let the liquid flow into the container for a set amount of time, say 30 seconds. Then, stop the stopwatch and check how much liquid is in the container. Repeat this process for each nozzle on the 12m boom. If the output from the nozzles varies by more than 10%, you might need to clean or replace some of the nozzles.
Step 5: Calculate the Average Nozzle Output
Add up the amount of liquid collected from each nozzle and divide by the number of nozzles. This gives you the average nozzle output. For example, if you have 20 nozzles and you collected a total of 1000 milliliters in 30 seconds, the average nozzle output is 1000 / 20 = 50 milliliters per 30 seconds.
Step 6: Measure the Swath Width and Travel Speed
The swath width is the width of the area that the sprayer covers in one pass. For a 12m boom sprayer, the swath width is 12 meters. To measure your travel speed, mark a distance of, say, 100 meters on a flat, open area. Drive your sprayer over this distance at the speed you normally use for spraying. Use the stopwatch to time how long it takes to cover the 100 - meter distance. Then, calculate your speed in meters per minute or kilometers per hour.
Step 7: Calculate the Application Rate
Now, it's time to put all this information together and calculate the application rate. The formula for calculating the application rate is:
[ \text{Application Rate}=\frac{\text{Average Nozzle Output}\times60\times\text{Travel Speed}}{\text{Swath Width}\times\text{Time}}]
Let's say your average nozzle output is 50 milliliters per 30 seconds. That's 100 milliliters per minute. Your travel speed is 5 kilometers per hour (which is 83.33 meters per minute), and your swath width is 12 meters.
[ \text{Application Rate}=\frac{100\times60\times83.33}{12\times60}= 694.42\text{ milliliters per square meter}]
Step 8: Adjust the Sprayer
If the calculated application rate is different from the desired application rate, you'll need to make some adjustments. You can change the pressure, the nozzle size, or the travel speed. Increasing the pressure will generally increase the output, while decreasing the pressure will decrease it. Changing to a larger or smaller nozzle can also have a big impact on the output. And of course, changing your travel speed will affect how much chemical is applied per unit area.
Step 9: Re - check the Calibration
After making adjustments, repeat steps 4 - 7 to re - check the calibration. Keep making adjustments and re - checking until the calculated application rate is very close to the desired application rate.
Other Considerations
When you're calibrating your 12m boom sprayer, there are a few other things to keep in mind. The weather can affect the calibration. Wind can blow the spray off - target, and high temperatures can cause the liquid to evaporate more quickly. Try to calibrate and spray on a calm, cool day.


Also, different chemicals might have different viscosities, which can affect the flow through the nozzles. If you're switching to a new chemical, it's a good idea to re - calibrate your sprayer.
Related Products
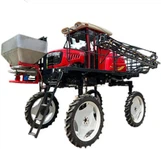
If you're in the market for other types of sprayers, we also offer some great options. Check out our Agricultural High Pole Sprayer and Four - wheel Sprayer. And of course, our 12m Boom Sprayer is a top - of - the - line product that's built to last.
Contact for Purchase
If you're interested in our 12m boom sprayers or any of our other products, we'd love to hear from you. Contact us to start a purchase negotiation. We can help you find the right sprayer for your needs and provide you with all the support you need for calibration and operation.
References
- "Sprayer Calibration Manual" - Agricultural Extension Service
- "Pest Management Handbook" - National Agricultural Library